Showing posts with label free. Show all posts

Wednesday, December 7, 2016

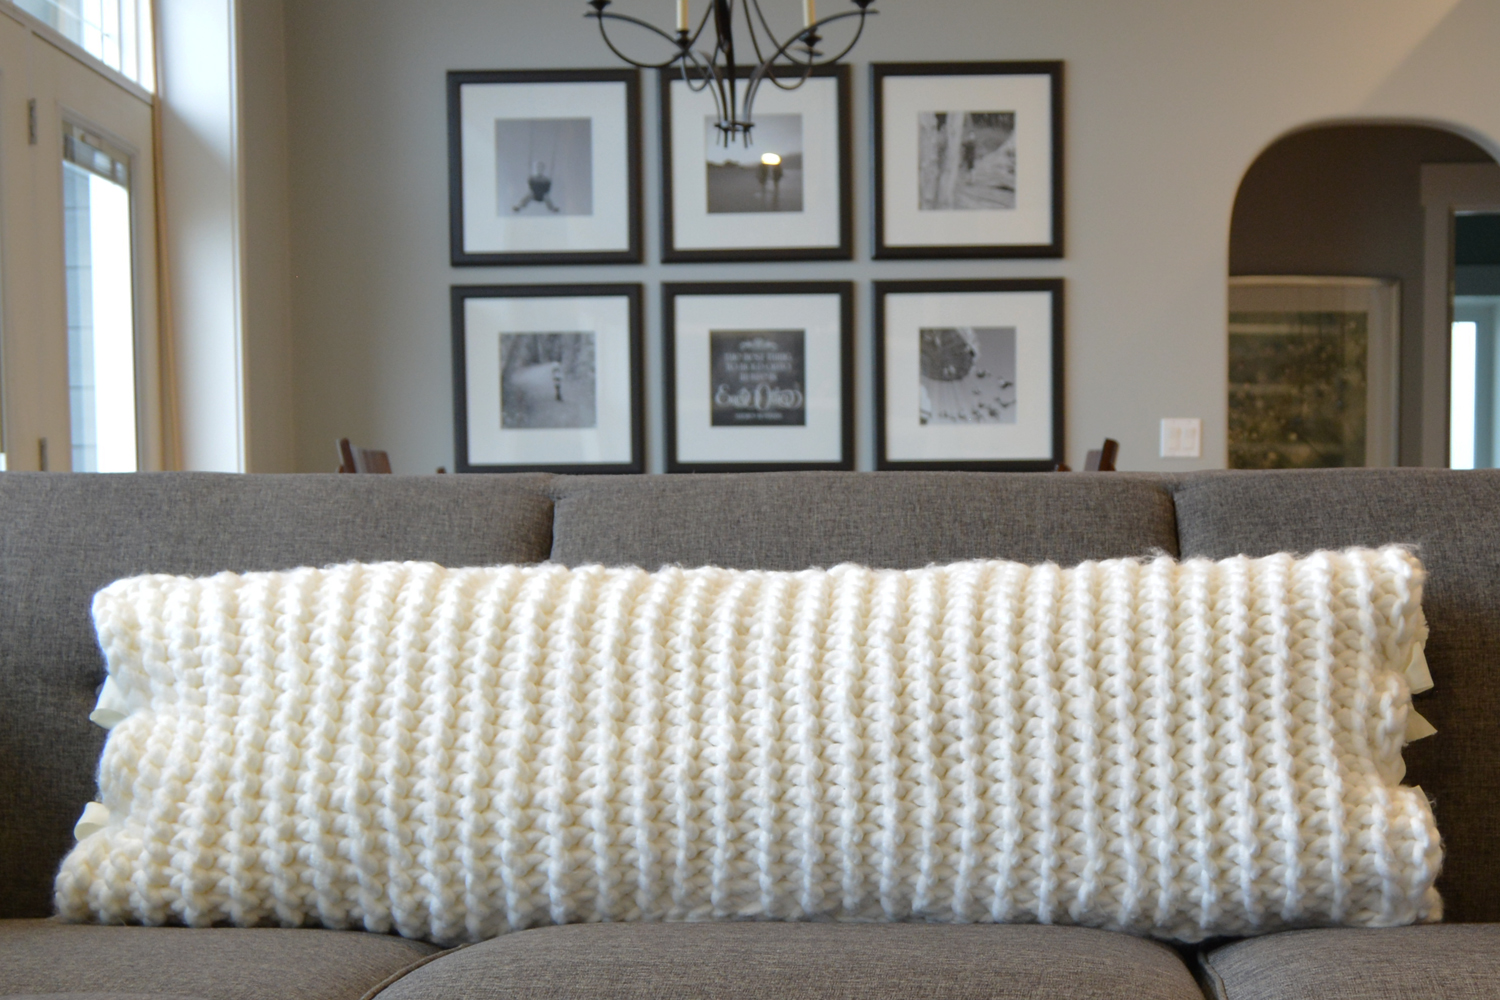
tutorial - chunky crochet sofa pillow cover by tara schreyer

Chunky knits are everywhere and we can see why. It is gorgeous and brings a cozy feel to any room. I wanted to try my hand at it and this was my creation. Want to make your own?


Materials
- 4 Balls of Loops & Threads™ Ginormous (100 yds/92m;15.8 oz/450 g)
- 25 mm (Size 50) crochet hook
- 120" (10') of 1.25" ribbon
- body pillow (measuring approx. 45" x 16")


Finished Size
Approximately 45" (114.3 cm) x 16" (43.2 cm). It has lots of stretch in these stitches.

Gauge
8 slip stitches x 8 rows = 6" square

Instructions for the Chunky Crochet Sofa Pillow Cover

Pillow Front/Back (make 2)

Chain 21.

Row 1: Working in back humps of chains, slip stitch in 2nd chain from hook and in each chain to end, turn - 20 sts. (Mark the first and last stitches of row with a stitch marker as it is easy to miss these stitches. Continue to move markers with each row.)
Row 2: (Mark as right side) Chain 1, working in the front loops only, 1 slip stitch in each stitch to end, turn - 20 sts
Row 3: Chain 1, working in the back loops only, 1 slip stitch in each stitch to end, turn - 20 sts
Rows 4 - 67: Repeat Rows 2 & 3 thirty-two more times
Row 68: Slip stitch in back loops only in each slip stitch to end - 20 sts
Fasten off, leaving a very long strand for stitching up the length of the pillow.

Finishing
Lining up the first and last rows, place wrong sides together and slip stitch the two panels together along the long edges. Leave the short edges open. 

Stuff the pillow into the pillow cover.

Cut four 1.25" ribbon into 30" (2.5') lengths. On the side of the pillow, weave two of the ribbons through a few loops on the inside of the pillow at the 7th stitch from each side.

 
 Tie into a bow or knot and trim the ends to the desired length. Repeat on other side.


Don't forget to share your finished projects on Ravelry. Can't wait to see everyone's projects!!


tara.


Monday, January 27, 2014

a chance to win...

Well, we normally save our freebie's for our occasional Random Friday Freebie, but this week is special! Susan at www.CrochetAddictuk.com is hosting a give-away on our behalf. Yay!!! And thanks Susan for taking that on!! 

You can win a package of 10 crochet patterns of your choosing! How fabulous!!  
 

Want to get in on the action? Hop on over to Crochet Addick UK to enter. There are lots of ways to enter the contest, and the more you participate in the greater your chance of winning. Hurry on over!!!! The contest ends on February 1st, 2014.


tara and kim.

Friday, December 2, 2011

first friday freebie.

wild primrose scarf - crochet pattern
by tara schreyer


Skill Level: Easy

This scarf is chunky and rugged yet beautiful. The name is appropriate as the middle section of the scarf is reminiscent of the hardy yet delicate Wild Primrose flower native to North America, Asia, and Europe.

This pattern is simple, calling for stitches such as double crochet, treble, and double treble, and can be completed in an evening, thus making it a great last minute gift for someone special.

Scarf Measurements: 223.5 cm (88") long" x 12.7 cm (5") wide


enjoy!

Friday, July 1, 2011

first friday freebie.

sweet lil' bandana - crochet pattern
by kim miller


You can crochet this sweet lil' bandana using only one 50 gram ball of Bernat® Handicrafter Cotton and scrapes of Patons® Grace. Perfect for when you need a quick head covering for your little one. 

Finished bandana measures 15 ½" across the front and 11" down the sides and will fit 4 years old and up.

Detailed crochet pattern is complete with chart and colour photos.

This crochet pattern is the first in our series of first friday freebies. The first friday of every month we will feature either a free pattern or we will announce a giveaway.


enjoy!


Friday, June 17, 2011

how to make felted wool dryer balls.


We were looking for a way to use up our ever growing collection of scrap wool, when we discovered wool dryer balls.  We had so much fun making them that we just had to share this great idea with you!

If you have never heard of wool dryer balls they are rapidly growing in popularity as an eco-friendly alternative to dryer sheets. They reduce static, they soften your cloths without the use of harsh chemicals and they cut down on drying time saving you money. You can also scent them by adding a few drops of your favourite essential oil.


You can purchase new 100% wool for felting, or you can use up your leftover scraps. The important thing is not to use a super wash or machine washable wool as this in theory will not felt. If you are worried about colour fastness in the laundry then you may want to stick to the light neutral colours.

Getting started


Start by winding your 100% wool for felting around your fingers.


Slide the yarn off of your fingers and wind in the other direction.


Fold the ball in half and keep winding. Don't worry about whether or not it is pretty.


If you are using scrap wool, when you reach the end of one colour just join the new colour with a slip knot and continue winding. We saved our largest yarn scraps for the outside so that our finished ball was one consistent colour.


When you have finished winding your yarn into a ball 10” in circumference, or about the size of a tennis ball, use a crochet hook to tuck your yarn end in.


To keep your yarn from unraveling in the washing maching you will want to place it in an old pair of nylons or the toe of a sock.


For added security you might want to knot a piece of cotton (non-felting) string around the sock. Wash with like colours in hot water in the washing machine. It may take a few washings to get the ball to felt. If you desire a fuzzier more uniform look you can remove the dryer ball from the sock (once you are sure that it is felted enough that it won't come apart)  and wash it on its own. Throwing it in the dryer will also speed up the felting process.


For added detail you can needle felt a design onto your felted dryer ball.


Simply divide your yarn into 3 seperate strands as shown.


Using 1 strand of yarn and a 38 gauge all-purpose felting needle lightly tack your design into place. If you are not satisfied with the results then simply pull the yarn off and start again. Don't be afraid to be creative. When you are happy with the design and its placement then stab the design evenly until it is firmly attached.


kim.

Monday, June 6, 2011

how to work in a spiral fashion in crochet.

In order to avoid a seam when you are working in the round sometimes a pattern will ask you to work in a spiral fashion. In this tutorial we will look at how to work in a spiral fashion in both single and double crochet.


When working in sc often at the end of round 1 you would join the round with a sl st, ch 1 and then you would continue on to round 2.


To work in a spiral fashion you do not join your work at the end of the round, but rather you work your first sc into the first stitch of the round. It's important to mark this stitch with a safety pin or a stitch marker.


This is what your work will look like at the end of round 2. Continue working in a spiral fashion moving your stitch marker up as you go.


To work in a spiral fashion in dc it might be better to start with a smaller stitch on the first round and then work your stitches in ascending order (sc, hdc, dc), but it is possible to start your first round in dc.


Work your first dc into the first st of the round. Again it is important to mark this first stitch.


This is what your work will look like at the end of round 2.


You can finish off your last round by creating a tapered end. To do this work your final stitches in a decending order. For example you could work the last 6 stitches as follows: 3 hdc, followed by 3 sc.


Finish off by working a sl st into the first stitch of the round.


kim.

Thursday, June 2, 2011

how to work a post stitch in crochet.

A post stitch, also known as a raised or relief stitch, produces a beautiful richly textured fabric. A post stitch is made by working around the post or the stem of the stitch on the previous row. Trebles may be used when you need to span multiple rows. For this tutorial we will be looking at how to crochet both a front post double crochet (fpdc) and a back post double crochet (bpdc).


fpdc = YO, insert the hook from front to back around the post of the st indicated, YO and pull up a loop (3 loops on hook), (YO and draw through 2 loops on hook) twice.


bpdc = YO, insert the hook from back to front around the post of the st indicated, YO and pull up a loop (3 loops on hook), (YO and draw through 2 loops on hook) twice.


kim.

Sunday, May 29, 2011

how to do a reverse single crochet stitch.

The reverse single crochet stitch, also known as the crab stitch, is an easy stitch to master yet despite its simplicity it makes a beautiful corded edge.


Reverse single crochet - With right side facing and working from left to right insert the crochet hook into the next st, YO and pull up a loop (2 loops on hook), YO and pull through both loops on hook.

If you are using the reverse single crochet as a border around a cushion or an afghan remember that you may need to add 2 or 3 stitches in each corner for your project to lie flat.

kim.

Friday, May 27, 2011

how to make an adjustable ring in crochet.


The adjustable ring, also known as the magic ring or the yarn ring, is not a new technique but it is one that has recently grown in popularity as it produces a small, neat center hole.  This is an easy technique to learn and once you have tried it you may never want to go back to the using the chain method as your starting ring.  In this tutorial we will look at how to make both the adjustable and the double adjustable ring.


To begin, wrap the yarn around your finger to create a loop. Make sure that you leave at least a 4" tail.


Using your crochet hook, draw the yarn through the loop.


You should have one loop on the hook.


Slide the loop off of your finger and work the chain as directed. For the purpose of this tutorial we will be working in double crochet so the chain 3 will count as the first double crochet.


Crocheting over the tail, work the required number of double crochets into the ring.


When you have finished working the required number of stitches simply pull the yarn tail until the center of the hole is closed.


For a more secure closure try the double adjustable ring. To make a double adjustable ring wrap the yarn around your finger twice to create a loop.


Using your crochet hook, draw the yarn through both loops. Continue working through each of the steps in the same manner as you would if you were making the adjustable ring.


kim.